Creating a custom home is a dream for many, offering the chance to design a living space tailored specifically to your needs, desires, and lifestyle. However, the process of turning this dream into reality can be complex and daunting.
This article will guide you through the essential steps of building a custom home, from the initial concept to the final touches, ensuring your design journey is as smooth and enjoyable as possible.
Step 1: Defining Your Vision
The first step in creating your custom home is to clearly define your vision. This involves more than just deciding on the number of bedrooms or the size of the kitchen. It’s about understanding how you want your home to feel and function. Consider the following aspects:
Lifestyle Needs
Think about your daily routines and how your home can support them. For example, if you work from home, you might need a quiet, dedicated office space. If you entertain frequently, an open-concept kitchen and living area could be essential. If you have young children, safety features and play areas might be a priority. Think about each member of your household and how the home can cater to their needs. This could include specialized spaces like a craft room, a workshop, or a home gym.
Aesthetic Preferences
Your home should reflect your style. Do you prefer the clean lines and minimalism of modern architecture, or the warmth and charm of a traditional design? Perhaps you’re drawn to the rustic appeal of a farmhouse or the sleek elegance of a contemporary design. Create a mood board with images of homes, interiors, and design elements that inspire you. This will help you and your design team align on the overall aesthetic direction.
Future Plans
Consider your long-term plans. Are you planning to grow your family? Will you need accessible features as you age? If you’re nearing retirement, you might want to include features that will make aging in place easier, such as wider doorways, a main-floor master suite, and non-slip flooring. Planning for the future ensures your home remains functional and comfortable for years to come.
Step 2: Setting a Budget
Once you have a clear vision, the next step is to set a realistic budget. This is crucial, as it will guide many of your decisions moving forward. Your budget should include:
-
Land Costs: The price of the plot where you plan to build. This can vary significantly based on location, size, and desirability of the area. Research the land costs in your preferred location and factor in additional costs such as site preparation, grading, and utility hookups.
-
Construction Costs: This includes materials, labor, and permits. Construction costs can fluctuate based on the size and complexity of the build, the materials you choose, and the region you’re building in. Get detailed estimates from multiple builders to ensure you’re getting a fair price.
-
Design Costs: Fees for architects and designers. These professionals play a crucial role in bringing your vision to life, so their fees should be considered an essential part of your budget. Design costs can also include 3D renderings and project management services.
-
Contingency Fund: Unexpected costs are almost inevitable, so it’s wise to set aside an additional 10-15% of your budget. This can cover unforeseen issues such as delays, changes in material prices, or additional work required due to site conditions. Having a contingency fund ensures that these surprises don’t derail your project.
Step 3: Finding the Right Team
Building a custom home is a collaborative effort. You’ll need a team of professionals who understand your vision and can bring it to life. Key players typically include:
-
Architect: Responsible for the overall design and ensuring that your vision is structurally feasible. A good architect will listen to your needs, provide creative solutions, and help you navigate building codes and regulations. They will also create detailed plans and blueprints that guide the construction process.
-
Builder/Contractor: Manages the construction process, hires subcontractors, and ensures the project stays on schedule. Look for a builder with a strong reputation, a portfolio of similar projects, and positive references. They should be able to provide a detailed timeline and cost estimate and communicate effectively throughout the project.
-
Interior Designer: Helps with selecting finishes, colors, and furnishings to create a cohesive look. An interior designer can save you time and money by sourcing materials, coordinating with suppliers, and ensuring that your design choices align with your vision and budget. They can also provide 3D renderings and mood boards to help you visualize the finished space.
-
Landscape Architect: Designs the outdoor spaces to complement the home. A well-designed landscape can enhance the beauty and functionality of your home, creating outdoor living areas, gardens, and pathways that reflect your lifestyle and aesthetic preferences. A landscape architect will consider factors such as climate, soil conditions, and maintenance requirements.
Step 4: Designing the Home
With your team in place, the design phase can begin. This is where your vision starts to take shape on paper. The design process typically includes:
-
Initial Consultation: Discuss your vision, needs, and budget with your architect. Be prepared to share your mood board, photos of homes you admire, and any specific requirements you have. This is also the time to discuss your budget and timeline, ensuring everyone is on the same page from the start.
-
Conceptual Designs: The architect will create preliminary sketches to capture the basic layout and style. These conceptual designs will include floor plans, elevations, and a rough site plan. This is an iterative process, so be prepared to provide feedback and make revisions until you’re satisfied with the overall concept.
-
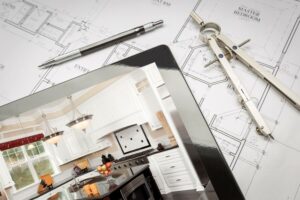
Detailed Plans: Once you approve the concept, detailed blueprints are developed. These include floor plans, elevations, and electrical and plumbing layouts. The detailed plans will specify the exact dimensions, materials, and construction methods, providing a comprehensive guide for the builder.
-
3D Renderings: Many architects provide 3D renderings to give you a virtual tour of your future home. These renderings can help you visualize the space, understand how different elements will look together, and make any necessary adjustments before construction begins. They can also be useful for selecting finishes, furniture, and décor.
Step 5: Securing Permits and Financing
Before construction can begin, you’ll need to secure the necessary permits and financing. This involves:
Permits
Submit your plans to the local building authority for approval. This process ensures your home meets all zoning and building codes. Permits may be required for various aspects of the construction, including site preparation, foundation, framing, plumbing, electrical, and final occupancy. The approval process can take several weeks or months, so plan accordingly.
Financing
Work with your lender to secure a construction loan. This typically converts to a mortgage once the home is complete. A construction loan is different from a traditional mortgage, as it provides funds in stages as the construction progresses. You’ll need to provide detailed plans, a construction timeline, and a budget to your lender. Shop around for the best terms and rates, and consider working with a lender who has experience with construction loans.
Step 6: Breaking Ground
With permits and financing in place, construction can begin. The building process is typically divided into several phases:
-
Site Preparation: Clearing the land, leveling the site, and setting up utilities. This phase may also include excavation for the foundation, grading for proper drainage, and installing temporary utilities for construction.
-
Foundation: Pouring the foundation, which may include a basement or slab. The foundation is a critical component of your home’s structure, so it’s essential to ensure it’s done correctly. This phase includes setting up forms, pouring concrete, and allowing time for curing.
-
Framing: Building the structural framework, including walls, floors, and roof. Framing gives shape to your home and includes installing trusses, beams, and joists. This phase also involves installing windows and doors and sheathing the exterior walls and roof.
-
Exterior Work: Installing windows, doors, roofing, and exterior finishes. This phase includes adding siding, brick, or stone veneer, as well as roofing materials such as shingles or metal panels. Exterior work also involves installing gutters, downspouts, and exterior trim.
-
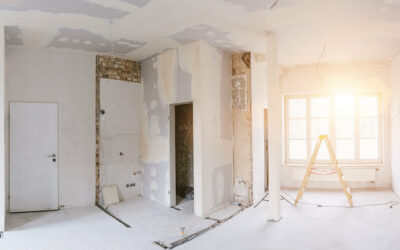
Interior Work: Running electrical and plumbing, insulating, and installing drywall. This phase includes rough-in work for electrical, plumbing, and HVAC systems, as well as insulation for energy efficiency and soundproofing. The drywall is then installed, taped, and finished.
-
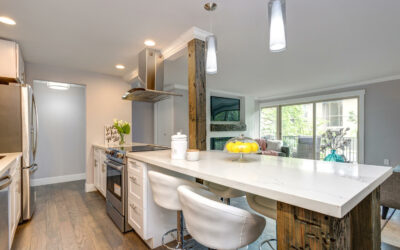
Finishing Touches: Adding flooring, cabinetry, fixtures, and paint. This is where your home starts to come to life, with the installation of flooring, cabinetry, countertops, plumbing fixtures, lighting fixtures, and interior doors. Walls are painted or wallpapered, and trim and molding are installed.
Step 7: Final Inspections and Walkthrough
Before you can move in, your home must pass a series of final inspections to ensure it meets all building codes and standards. These inspections typically cover:
-
Structural Integrity: Ensuring the foundation, framing, and roofing are sound. Inspectors will check for proper installation, materials, and adherence to building codes. They will also verify that the structure can withstand local environmental conditions.
-
Electrical and Plumbing: Verifying that all systems are installed correctly and safely. This includes checking wiring, outlets, light fixtures, plumbing fixtures, and water heaters. Inspectors will ensure that all systems meet safety standards and function properly.
-
Safety Features: Checking smoke detectors, carbon monoxide detectors, and egress windows. Inspectors will verify that safety features are installed in the correct locations and meet all code requirements. This is crucial for ensuring the safety and well-being of your family.
Once the inspections are complete, you’ll do a final walkthrough with your builder to ensure everything is to your satisfaction. Make note of any issues or unfinished work, and create a punch list for the builder to address before move-in. This walkthrough is your opportunity to inspect every aspect of your new home and ensure that it meets your expectations.
Conclusion
Building a custom home is a significant undertaking, but with careful planning and the right team, it can be an incredibly rewarding experience. From defining your vision and setting a budget to moving in and maintaining your new home, each step brings you closer to realizing your dream. By following these steps and staying involved throughout the process, you can create a home that truly reflects your personality, meets your needs, and provides a sanctuary for years to come.
Read Other Blog Posts to Better Understand Home Design and Construction Remodeling Advantages
Open Concept Living Solutions: The Magic of Professional Wall Removal Services
In the realm of modern interior design, the concept of open living...
How to Find the Best Home Remodeling Contractor in Central Oregon
Central Oregon, with its stunning landscapes and vibrant communities,...
Custom Crafting Your Dream Space: The Impact of Interior Design Services
Your living space is a canvas waiting to be painted with the hues of...
What to Expect During a Home Remodeling Project: A Complete Guide
Home remodeling projects can be both exciting and daunting. Whether...
Transformative Trends: Home Renovation Ideas for Every Homeowner Budget
Homeownership comes with a constant desire to improve and personalize...
Learn Home Remodeling for Less: How to Get Big Results with Small Investments
Your home is your sanctuary, a place where you can relax, unwind, and...


